The following information is provided “as is”, I have found it to work in my environment but I am not an official employee for Nutanix or Microsoft. If you want to learn more about Nutanix I can defintely recommend the following blogs:
- Steven Poitras aka the Nutanix god, creator of the nutanix bible: http://stevenpoitras.com/the-nutanix-bible/
- The Nutanix index: http://myvirtualcloud.net/?page_id=5770
Check out my previous blog post about Integrating Nutanix Hyper-V with SVMM 2012 R2: https://davyneirynck.wordpress.com/2014/04/17/integrating-a-nutanix-hyper-v-cluster-with-scvmm-2012-r2/
In this article I will explain and demonstrate what needs to be done to make sure you can deploy your virtual machines from a template using ODX. ODX stands for Offloaded Data Transfer and in short makes sure that the SAN or in our case Nutanix will be used to transfer the blocks instead of that those files needs to be transferred over the network. As you would guess by now, this makes deployment of your virtual machines go a lot more faster.
Currently ODX on Nutanix is invoked for the following operations:
- In VM or VM to VM file copy on NDFS SMB share
- SMB share file copy
- Deploy template from SCVMM Library (NDFS SMB share)
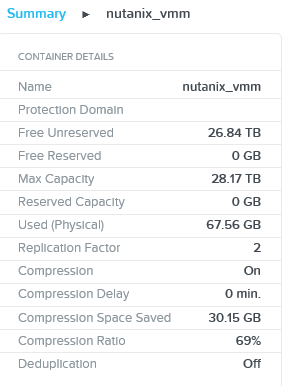
In the PRISM UI, you will need to have 2 containers. One called “CTR1” in my case, used to store all my running virtual machines and a “nutanix_vmm”, the container that I use to store my ISO’s and ofcourse templates. I enabled compression on this second container and just watched how I got up to 69% compression, enabling me to save 30,15GB.

Don’t forget to edit the filesystem whitelist settings in the PRISM UI, enabling your VMM server to access the nutanix storage:
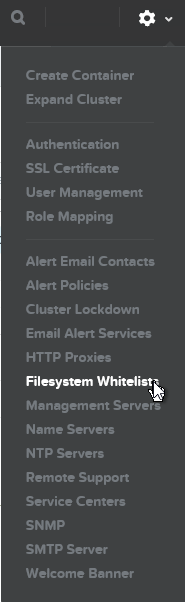
Add the IP-address of your servers in the following format: x.x.x.x/subnetmask (example: 10.32.1.5/255.255.255.0)
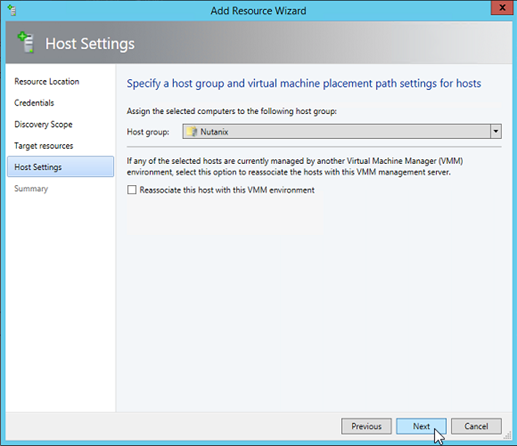
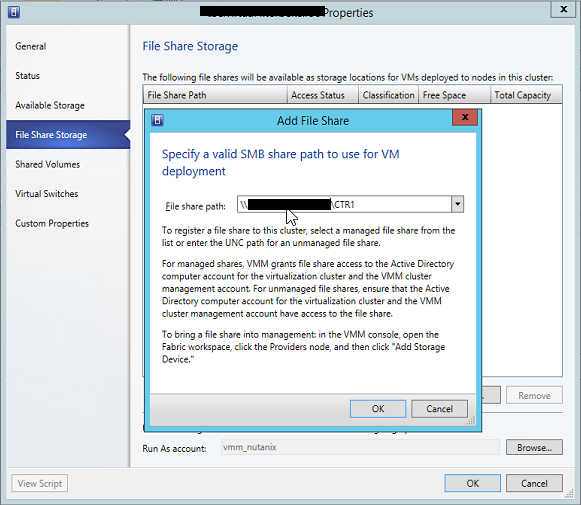
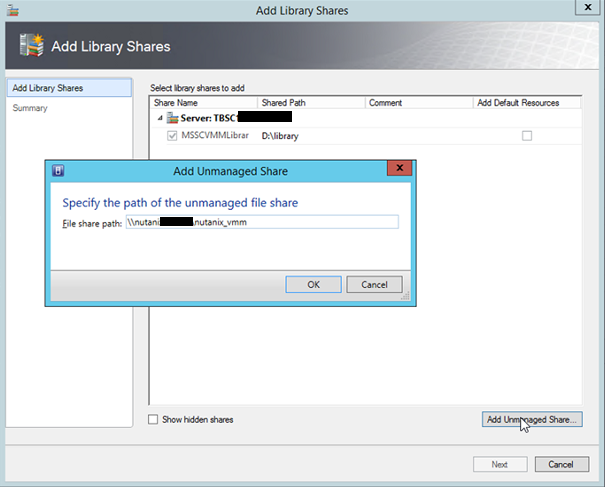
Let’s get started with the configuration in SCVMM, we need to add a library share that is pointing to our “nutanix_vmm” container for the placement of our templates, hence when we deploy a VM based on this template, ODX will kick in and will makes sure that the blocks are transferred to our other container. In my lab I have found that deploying a VM based on this template using ODX gives me a fully patched, domain joined, windows activated VM in less then 7 minutes. If i’m not using ODX this was around 17 minutes.
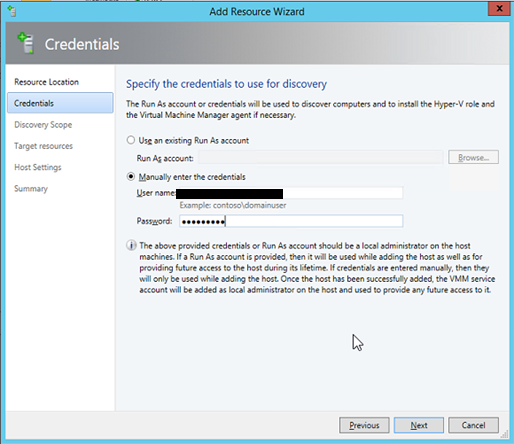
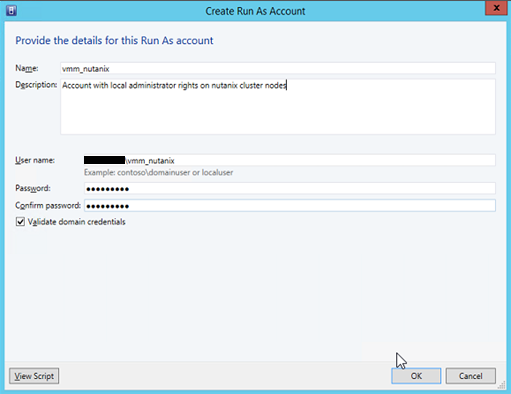
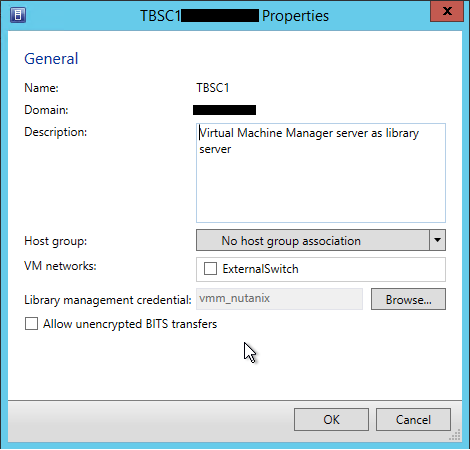
Go to library, right click your library server and change the properties so your run as account is linked as the management credentials of the library server.
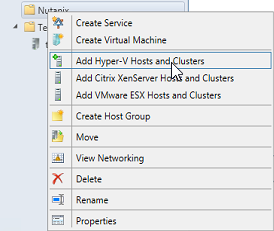
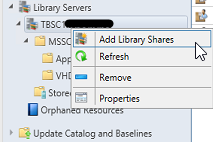
Now select “Add Library Shares”
It’s very important not to add your FQDN to the Nutanix container or ODX will not work, I’m pretty sure this is a Microsoft issue.
After this the new library share can be used.
I created a new Generation 2 virtual machine, this provides the following new functionality on a virtual machine:
- PXE boot by using a standard network adapter
- Boot from a SCSI virtual hard disk
- Boot from a SCSI virtual DVD
- Secure Boot (enabled by default)
- UEFI firmware support
- Faster Boot Time and Faster Installation of Guest Operating System
- IDE drives and legacy network adapter support has been removed
However, you must be running any of these operating systems to run a gen2 Hyper-V VM:
- Windows Server 2012
- Windows Server 2012 R2 Preview
- 64-bit versions of Windows 8
- 64-bit versions of Windows 8.1 Preview
When creating a template, I always follow these guidelines:
- Create your vm and give it a clear name such as 2012r2_STD_gen2
- Download and install all updates
- Customize the settings you prefer such as windows firewall, IE SC, remote desktop, ..
- Shut down the VM and perform a clone operation in SCVMM so we don’t loose this reference image (name this machine for instance 2012r2_STD_gen2_template)
- Create a template in SCVMM on this cloned VM and save it in your newly created library share (nutanix_vmm)
The reason why you need to clone your machine is because your virtual machine will be destroyed in order to turn it into a template. I tend to re-create my template every 3 months, all you need to do is start up your original machine, install your updates and maybe some additional software that you use in your company, clone it again and create the template. Make sure you hold a document where you can track your changes.
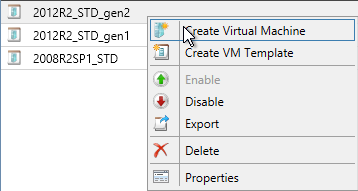
When you have done all of this, your template will be shown in the library pane and you can right click on it to create a new virtual machine based on this template.
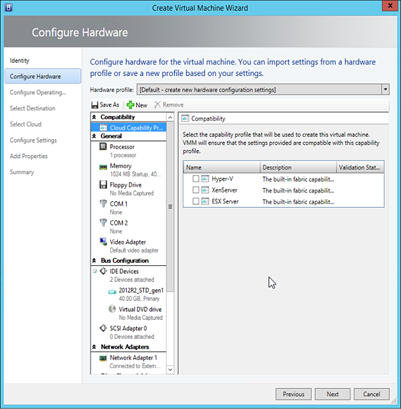
I configured my hardware settings as followed, nothing really special going on here:
The OS settings are a lot more fun, this is were you can really save some time. I’m using the new AVMA keys to activate my guest VM’s. Have a look at this Technet document to find out what AVMA is: http://technet.microsoft.com/en-us/library/dn303421.aspx
Also, I can define here that this vm must join my domain, using the following credentials (the run as account I configured in my previous blog post).

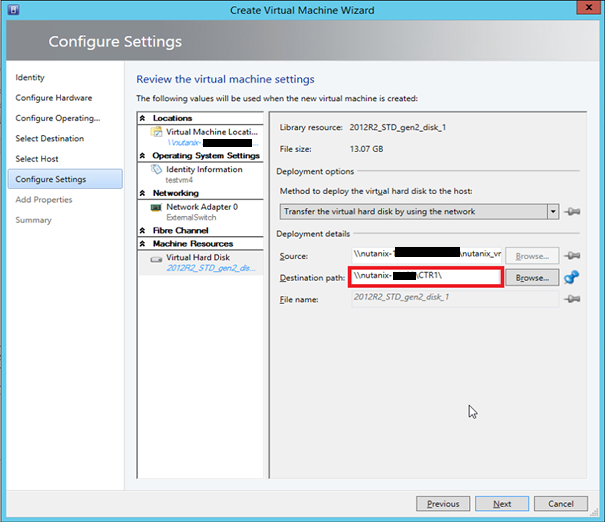
Again, I’m guessing this is a Microsoft issue, you need to remove your FQDN on the destination path (e.g. \\nutanix-1234\CTR1) or your deployment will fall back to BITS over HTTPS.
For some reason there is still a bug in SCVMM when trying to create a virtual machine based on a gen2 template, it just comes up saying there is no boot device..
To resolve this, simply issue these powershell commands so the boot device of the template are changed to the SCSI adapter:

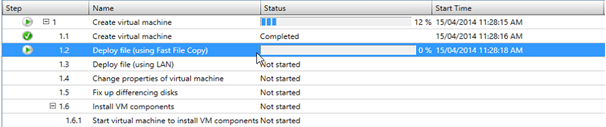
And finally watch how your virtual machine is deployed using fast file copy
In a next article I will discuss the setup of a powershell script I wrote to export my running virtual machines to a Synology NAS.